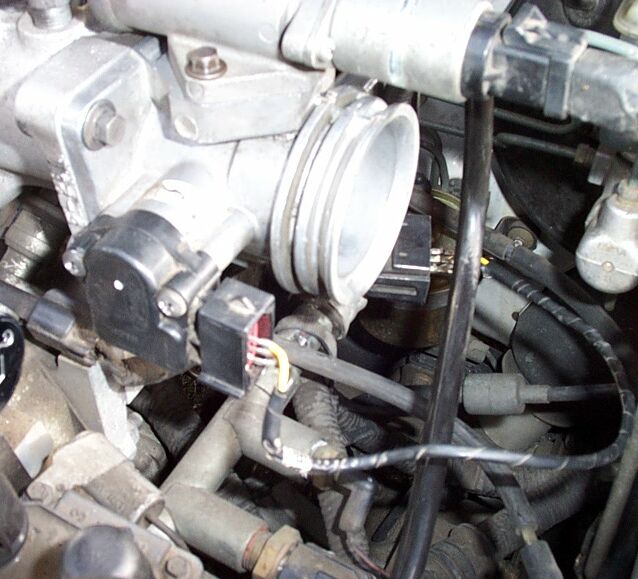
1. First of all, you will need to acquire a throttle body from a 88.5-90 Escort GT or a 3.8l Taurus, Sable, or Thrunderbird (not sure of years on those, sorry). I used the Escort GT TB and this How-to is based on that. There may be slight differences between the two but from what I've heard it's basically the same. This throttle body is about 20% larger than the stock one for the second gen 1.9l. As I was looking I found that there are actually two different ones on first gens. You will need to find a newer one (88.5-90), since this is the one that uses the exact same throttle position sensor (TPS) and air bypass valve. I happened to get one from the local pull-a-part for $14. You will notice that the TPS and the throttle cable hook-ups are on opposite sides from your car. It also uses a different throttle cable hookup. See the pictures below.
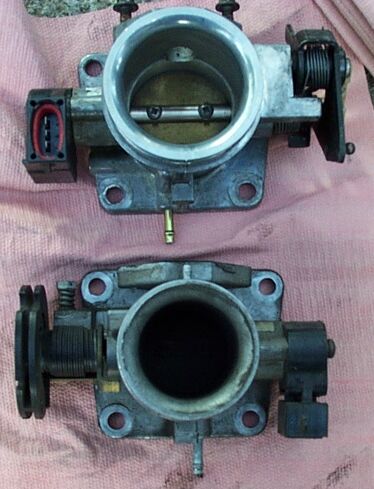

| On top is the new throttle body, which I pulled from a '90 Escort GT. Although the TPS looks different it is actually the same part #, so it works fine. Be sure to check this, or just put your old TPS on. Before doing anything, take some carb cleaner and get all the gunk out of the new throttle body. The one I had actually wasn't too bad looking in the first place. |
2. You will also need some tools (duh).
3. Some good sheetmetal or some miscellaneous brackets.
4. A dremel or
something you can grind metal with.
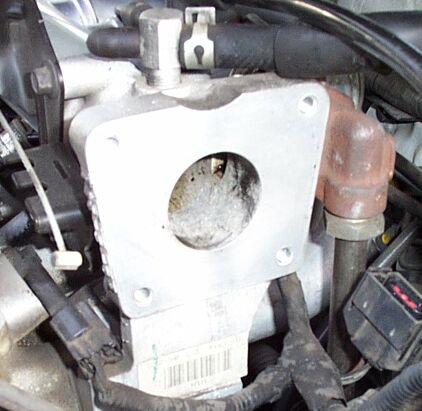
Now we get to the actual swap. Start by removing your intake tube from the throttle body. Now disconnect the throttle cable. Next, unplug the TPS (on the side) and air bypass valve (on the top). Now you can remove the 4 bolts that hold the throttle body on. Try not to damage the gasket unless you want to buy a new one. After you get it unbolted, disconnect the vacuum hose off the bottom. You should now be able to remove the throttle body and the plenum should look like this.
The plenum will have to be enlarged to keep the airflow smooth through the new TB into the manifold. I used a dremel tool with a few different grinding bits and sanders and it worked OK. It definitely takes a while though so be patient. To get the hole the correct size I cut the old gasket to the new throttle bodies size, and then put it on the plenum and used it as a template.
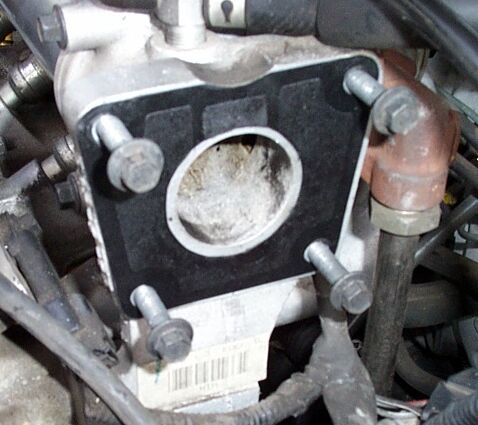
Be sure to stuff some rags into the plenum so that no metal particles get in there while you are grinding. Here is what it looked like after I ground it all down.
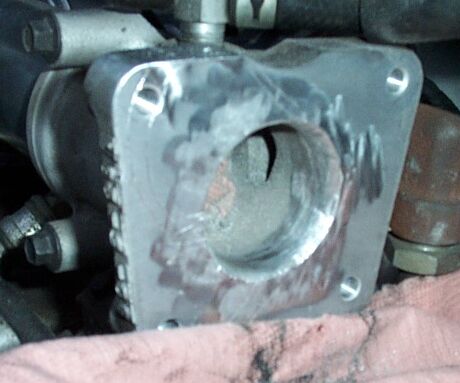
After grinding the hole I finished it off with a wire
brush to get it as smooth as possible. Although it looks crappy it is actually
smoother than the stock finish on the inside.
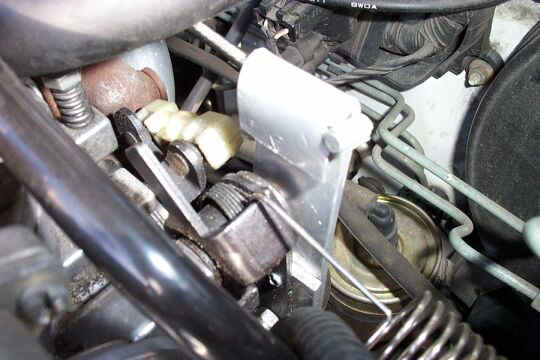
Now that you have the porting finished, it's time to start making some brackets for the throttle cable. I used an L-bracket for the cable holder and a small piece of sheet metal to attach the cable to the throttle body.
The new throttle body has a different connection on it for the cable, so you need to make a bracket so the cable can pull on it. You can see all I did was make one that sticks up and the cable pulls it back. Make sure to attach the bracket right near the pivot point so it will move smoothly. Otherwise you may find the cable coming off or something. Another idea I had was to attach the old round piece from the old throttle body. But you can basically make any bracket you want as long as it works.
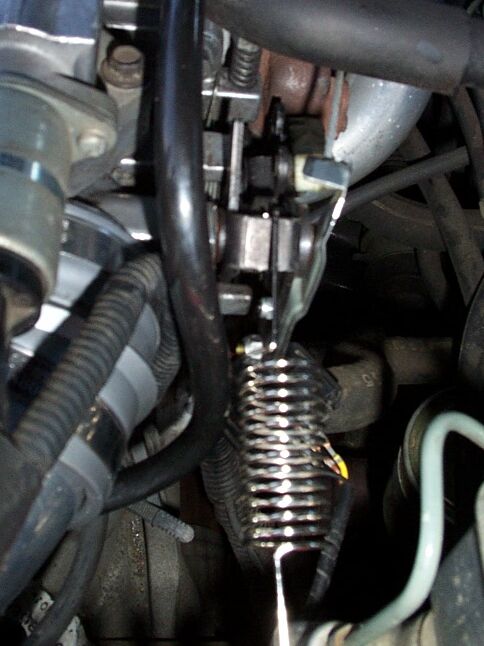
Update: The original cable connection bracket was too flimsy and the cable kept coming off, so I made a new one out of aluminum stock. Of course here's a couple pics.
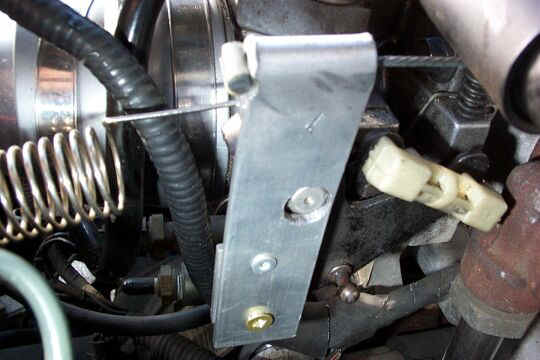
For the cable holder itself all I used was an L-bracket. I cut a piece out to attach the cable mount, and then bolted the bracket through the firewall. It ended up working perfectly. The most important part of this step is to make sure that the cable lines up with the throttle body as close as possible, to avoid having the cable fall off. I bent my bracket slightly so the cable has no friction in movement at all.

Once you get the brackets all made, you can move on to
installing the new throttle body.
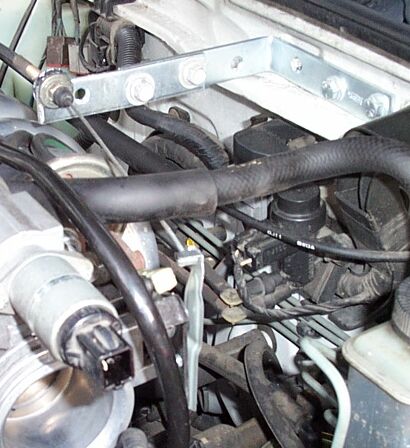
You'll notice that the new throttle body is actually a bit longer than the old one. This is bad since it's already very close to the battery. I ended up having to slice about an inch (1") off my intake tube to make it fit. It is still a very tight squeeze. The easiest way to do it is like this:
Measure and cut down your intake tube so it will fit between the new TB and the battery. Take the throttle body and attach the intake tube to it before you install it in the car. This makes it a lot easier to fit it in there. Now just stick the whole piece in, install the gasket, and tighten the four bolts that hold the throttle body on. Now you can re-attach the air bypass valve and plug it in. Connect the vacuum line to the bottom of the throttle body. The final problem you will run into now is that the plug for the TPS won't reach anymore. I happened to have a cable which worked perfect to splice it together.
This cable is actually from an Escort also. It is
the one used to connect the power mirrors inside the doors for second gens. So if
you go to the junkyard, snag one of these. All I did was remove the contacts from
the plugs and the contacts fit perfectly on the TPS and TPS plug. The only thing I
am worried about now is that there is no moisture seal on the TPS anymore. I'll fix
that later though.
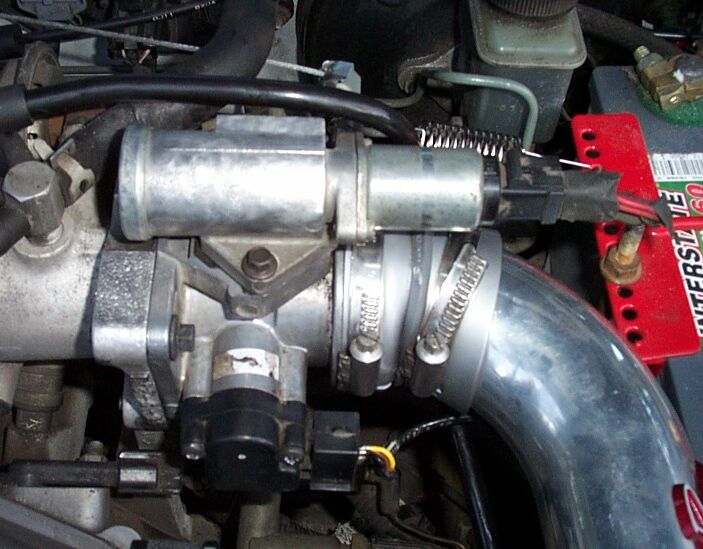
After this, you should be ready to fire up the engine. Double check all the connections first of course. You will probably notice the throttle will be way too easy to push. Mine was, so I got a throttle return spring and put it on. You can connect it to different spots to make it feel more or less stiff.
Now go for a ride! I noticed a nice increase in
throttle response and also a little more pickup above 2500 rpm. I think this swap is
well worth the 2-3 hours work, probably even less if you plan it all out first.
Here is the finished product: