1. Remove the four phillips screws holding the plastic trim onto your steering column, then remove the trim. Now look underneath your dash and you will see 4 gold-colored bolts. You will need to remove these 12mm bolts to lower the steering column and allow removal of the dash trim panel.


2. Now that you have the steering column lowered, you can remove the dash trim panel. Locate the three torx head screws in center above the gauges and remove them. Then locate two torx screws under the vents on the right of the steering wheel, and one torx screw to the left of the steering wheel. Remove these also.
3. After removing the 6 torx screws you can pull off the trim panel to expose the gauge cluster. You will now have to remove the four screws which hold the gauge cluster into the dash. I marked them in yellow in the below picture.

4. Once these 4 screws are removed the cluster will be freed from the dash. Before pulling it out you must remove the speedometer cabel from behind. Stick your arm up behind the cluster and feel around for where the cable connects to the speedo. There will be a clip holding it on, which you squeeze and pull off. Once this is complete you can pull the cluster out a bit and remove the three electrical plugs in the back of it. Now just remove the entire cluster from the car.
1. Take yor gauge cluster and remove the six small torx screws that hold the case together. This will seperate the two halves of the gauge cluster case.

2. Now you have your gauges sitting right there in front of you. Now is a good time to change any bulbs if they were out. In order to keep the needles and odometer lit I left all 4 gauge bulbs installed. You might be able to remove one or two if you have a tach cluster, not sure though. OK now grab your new gauge faces. Don't connect any wires yet, they'll just get in the way.

5. Slip the new faces over the needles, being VERY careful not to break them! The speedo face seemed pretty right fitting around the needle, but it will fit if you mess with it. Once you get them on it looks like this:

*Note the yellow arrow pointing at the trip odometer reset button. Be sure to keep the wire out of the way when putting the cluster back together! If the wire is in between you won't be able to reset your trip meter!
6. Now you must use something to hold the faces down. They will slip all around if you don't do something about it. I just put small pieces of tape on the edges where it is not visible, but you could easily use double sided tape, glue, or whatever else you want. Be sure to them straight and aligned correctly!
7. Test fit the cluster back together after securing the gauge faces. Note where the wires come out and mark that on the uppe half of the cluster. Then take some clipper and snip away the area where the wires will come out. Here is a pic of the area below where the speedo will be. Note the two trimmed spots on the left, and one on the right where the wires will come out of the cluster.

8. Test fit your cluster back together again and check the gauge faces for proper alignment. My temp gauge seemed a little off so I had to lower it about 2mm compared to how it was cut. I am not sure it they are all like this though. Once you get everything aligned you can screw the cluster back together. You'll notice the wire from the speedo face gets jammed between the cluster pieces. I couldn't avid this and just screwed it together as is. That's all for this step.

1. Take the cluster and stick it back into the dash. Shove the gauge wires down the back where you can get to them. Take your gauge control and plug the auge wires into it. Connect the black ground wire to a ground somewhere, and splice the red power wire to the interior dimmer switch GREEN wire. On newer models this wire may be SOLID RED. You can also probe the wires going to the back of the cluster itself with a multimeter and find a power source there instead.

2. Now connect the 3 electrical plugs to the back of your gauges, and screw the cluster back in. Next, put the trim panel back on and secure it with the 6 screws. Now raise your steering column and put the 4 bolts back into it also. Reinstall the steering column trim. Lastly, reach around the back and reconnect the speedometer cable to the speedo.
3. Everything should work now! All you need to do is mount your switch in the desired position and that's it! Hope this guide helped you out!
The finished product:

Blue Glo:

Green Glo:
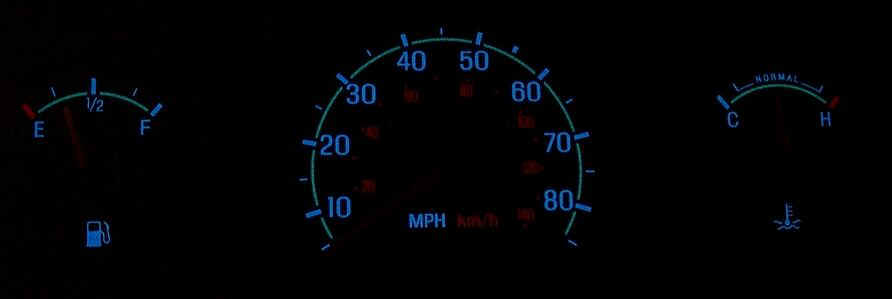
Note: You CAN see the needles, but for some reason my camera didn't pick them up in the pics.